Support QRP CoA Everywhere

Sunday 31 January 2010

501-504kHz LO for Field Strength Meter


As per previous post about 500KHz (http://m1kta-qrp.blogspot.com/2010/01/500khz.html), based loosely on PA0SE field strength meter which is a DC RX just built a 4MHz LO and used a 74HC4040 and divide by 8 to obtain 500kHz. Video of the initial 4MHz oscillator here:

Current playing with the required L and Variable C in series with the crystal that might allow the 4MHz oscillator to be pulled from 4.008MHz to 4.032MHz. I think probably too far for the crystal oscillator version so I might look at using a ceramic oscillator next.
Yes this is the oscillator circuit from M0MBU FEt TX for 500KHz which you might be able to make out in the background.
I'd prefer to keep it simple but if no luck then the next option will be a K5BCQ Si570 DDS VFO with frequency readout that will be fed into the divide by 8 logic of the 74HC4040.

BCD switches


1/4 watt resistor as size comparison.

Posting images for someone else...

Saturday 30 January 2010

500kHz


Just applied for the 500kHz NoV.

In the shack building a 500KHz version of the PA0SE field strength meter for 500kHz which is basically a DC RX with audio and DVM readout.

Will use DVM M-830 B that can sense to 200uA and 2000uA.

Mixerwill be SA612 or TFM-335 (Mini ciruits, because I have some!)

TL072 Dual op amp

The LO still making up my mind but think a colpitts oscillator might be easiest. Either LC type or use a 500KHz ref crystal and pull it a little. Otherwise 4MHz colpitts with a PNP buffer and then divide by 8 using perhaps a 74HC4040.

For the front end will use an LF preamp/selector for 500KKz using J310/2N2222A and the preselector is simple LC filter using 1mH axial choke and 500pF capacitor.

I will use a ferrite rod, for the input, and as I have a couple I might try and use a superdrug (http://www.hanssummers.com/ for GQRP homebrew silliness) ferrite rod and add additional winding to the MW coil suitable for 500kHz. Will dip the coil for 500KHz.

No circuit at moment but I'll write it up.

It's snowed last night and it is cold outside the shack and the cat helped select the circuits.

Friday 29 January 2010

500KHz and ferrites

OK hen's teeth time trying to find 3C85 and 3C90 cores. but found a few.... however I recall a conversation I had a while back that you could sometimes use switched mode power supply ferrites. Such as those from PC ATX supplies as they use of high permeability ferrite cores for the switching transformer.

I share the notes I have:
High permeability iron powder cores would be too lossy at 500KHz. Type 77 ferrite is ideal for switched mode supplies operating at 20 - 500 kHz. Although the toroid core is the most efficient shape, the pot-core E-core are often used for ease of winding.

A lot of reading manuals for switch mode supplies and as components in the power supply must of course be suitable for operation at the switching frequency it might safe to assume that T-( )-26 cores are ideal for the storage and filter inductors in supplies operating up to 250kHz. Above 250kHz they see to use T-( )-52 cores or some pot cores (185k), and e-cores (184k).

There sees to be three basic circuit types for smps, and the one chosen will depend upon the application. The most efficient use of the ferrite switching transformer occurs with the push-pull circuit, and as I have some of those and many PC ATX supplies see to be of this type the following information applies.

First a general assumption that smps transformers operating at 20 kHz can have a max. core flux density (Bmax) of 2000 gauss/200 mT. At higher frequencies Bmax must be reduced. A plot of Bmax vs Frequency gives a good idea of the relationship. Excessive temperature rise must be avoided either by using a larger size core and/or wire or reducing the output power. As a guide, the following table shows power capabilities of some different core shapes/sizes at three switching frequencies:

Toroid Cores Switching Freq. (kHz) Pot-Cores Switching Freq. (kHz) E-Cores Switching Freq. (kHz)
20 50 250 20 50 250 20 50 250
FT-240-77 1000 W 1500 W 4000 W


EA-77-625 230 W 350 W 1000 W
FT-140-77 200 W 300 W 850 W PC-3622-77 110 W 190 W 450 W EA-77-500 100 W 210 W 500 W
FT-114A-77 140 W 210 W 600 W PC-2616-77 30 W 50 W 130 W EA-77-375 60 W 100 W 260 W
FT-114-77 70 W 110 W 300 W PC-1811-77 5 W 8 W 20 W EA-77-250 13 W 20 W 55 W
FT-50A-77 5 W 8 W 20 W PC-1107-77 3 W 5 W 12 W EA-77-188 5 W 8 W 20 W

Tuesday 26 January 2010

Si570 DDS


I had just been sent a pair of K5BCQ Si570 DDS kits
http://www.qsl.net/k5bcq/Kits/Kits.html and so put one together.

Took minutes to build..... However, you REALLY want to follow the instruction from http://www.cliftonlaboratories.com/si570_kit_from_k5bcq.htm

Anyway here is a brief video of it. No background music or CW QSO's this time in the shack hihi...

Monday 25 January 2010

PTO VFO


As variable capacitors are not cheap or easily availabe all the time and the use of a varicap diode does not always appear to be an option then the use of a variable inductor is another option.

The construction requires a bit of thought though.

I had a rummage in the garage to see what I had where a rotary motion could be translated into a push/pull direction easily enough, and the screw in/out action of a window frame fixing seems to fit the criteria and it rigid so I will attempt to recreate one to build a reproducable PTO based on the circuit by Steve Weber (KD1JV) that was modified by KE7HR with a trimmer capacitor to shift the frequency a bit.

I have a pile of straws from MacDonalds, Starbucks etc all with approx 7-8mm diameter that I have meant to use for coil formers to build a PTO with since the GQRP rally a while back.

Construction details.

Circuit build manhatten style on a scrap of pcb. I used J310 instead. Probably obvious but on the diagram orange highlighter blobs are manhatten pads.


On a separate scrap drill an 8mm hole, this is a very tight fit for one of the M5 Nylon nuts I have.


Araldite the nut in place(photo to follow) after making sure the outside is flush with the plane of the PCB.

Solder this board at 90 to the plane so the PTO inductor is above the circuit.

The rest of the construction details and images will follow...

Ideally I want a PTO with 11-11.2MHz, 5-5.2MHz or 2.1-2.3MHz it is all a matter of which IF frequencyI want to use.

First stab... with a scrap of #28 wire.
15T #28 on the clear Starbucks straw is 1.3uH close wound.
Using a 1" brass slug (6mm diameter tube) the inductance reduces to 0.74uH.


This video is of the rough prototype and the frequency shift is from 8.7Mhz to 9.1MHz.
You might need to turn the volume down if you play it!

I'm in the shack and the music in the background is Barclay James Harvest, "Back in the Game" from the album Mockingbird.

Friday 22 January 2010

Manhattan Pads

Asked a few times... where do I get the 5mm round Manhattan Pads that can be seen in images.

Answer is I have a supply from few years back (David Walters) but he doesn't do them any more, and running out.

The easiest options are to either drill an island in PCB or create your own pads.

You could just snip squares off strips of PCB with tin snips which works pretty well or if you want nice circular pads you could use a Harbour Freight Punch like this one http://www.harborfreight.com/cpi/ctaf/Displayitem.taf?itemnumber=44060 that I also mentioned earlier on the blog.

In UK there are the odd examples of this hand punch on ebay the latest is item 390142947372

New alternative pads MeSquares may also available from GQRP sales which are originally from W1REX at qrpme.com

Wednesday 20 January 2010

QRP ARCI 72 component challange

Interested to hear if anyone else from the UK going to have a go at this?

72

Dom
M1KTA

Friday 15 January 2010

Paraset 20H Choke


Well XYL seems to have gone behind me and bought one of the replica chokes from Danbury Electronics which explains why my notes about it and testing a small 12V/240V transformer as a choke 'disappeared'. Thought I had put them elsewhere. I think was supposed to arrive for Xmas but seems the snow may have held it up arriving.

How many components in a 4066 or 74HC4053?

I'm plagued with trying to work this out for a project.

I need to figure out what the internal component counts of these would be if they were built using discrete components instead...
Both are quad switches and I think the 4066 has 8 per switch and 4 switches so 32 components. The 74HC4053 has 16 per switch and 4 switches so 64.

Anyone know?

Tnx

Dom
M1KTA

Flea Update III - T1 high res pictures


As promised High res pictures of T1 winding.

I used 3 colour wires (this always makes identification easier).

Primary is Gold
Secondaries are Green and Red.


Green connects between LPF and Ground
Red +Vcc and Q1
Gold +Vcc and C3 (The trimmer)

T1 sits about 4mm above the ground plane held there by the wires solder points. I had thought about sticking an off cut of an old loyality card or credit card, my favourite insulator of choice, underneath it.

Wednesday 13 January 2010

Blog is just handful of countries away from DXCC!

Just a bit of fun but I thought it was interesting watching this. I only put up the blog to track projects between myself and another whilst I was working but I added the tracking widget and the blog is only a handful of countries off DXCC hihi
The list of unique visitor includes Yemen so I guess loose one as that DXCC isn't active, are the Faroe Islands OY? The two letters are the Geopolitical country abbreviations. It would be interesting to RX comments from some of these DX locations.... cq cq cq de m1kta m1kta m1kta pse k

United States (US) 1,245
United Kingdom (GB) 970
France (FR) 306
Germany (DE) 276
Netherlands (NL) 206
Italy (IT) 198
Canada (CA) 120
Poland (PL) 120
Spain (ES) 110
Czech Republic (CZ) 109
Belgium (BE) 99
Sweden (SE) 97
Hungary (HU) 96
Romania (RO) 94
Russian Federation (RU) 92
Australia (AU) 81
India (IN) 76
Brazil (BR) 73
Japan (JP) 71
Greece (GR) 69
New Zealand (NZ) 61
Slovakia (SK) 57
Bulgaria (BG) 54
Ukraine (UA) 53
Indonesia (ID) 53
Finland (FI) 50
Norway (NO) 46
Slovenia (SI) 45
Portugal (PT) 44
Croatia (HR) 44
Europe (EU) 39
Ireland (IE) 36
Turkey (TR) 34
Denmark (DK) 33
Argentina (AR) 32
South Africa (ZA) 30
Serbia (RS) 27
Switzerland (CH) 26
Austria (AT) 25
Israel (IL) 24
Korea, Republic of (KR) 23
Iran, Islamic Republic of (IR) 23
Thailand (TH) 21
Lithuania (LT) 19
Estonia (EE) 15
Singapore (SG) 13
Malaysia (MY) 12
Mexico (MX) 9
Egypt (EG) 9
Taiwan (TW) 9
Belarus (BY) 8
Hong Kong (HK) 7
Latvia (LV) 6
Peru (PE) 5
Bosnia and Herzegovina (BA) 5
Pakistan (PK) 4
Vietnam (VN) 4
Chile (CL) 4
Philippines (PH) 4
Saudi Arabia (SA) 4
Uruguay (UY) 4
Kazakstan (KZ) 3
Isle of Man (IM) 3
Faroe Islands (FO) 3
Venezuela (VE) 3
Sri Lanka (LK) 3
China (CN) 3
Puerto Rico (PR) 2
Libyan Arab Jamahiriya (LY) 2
Guadeloupe (GP) 2
Aland Islands (AX) 2
Honduras (HN) 2
Iceland (IS) 2
United Arab Emirates (AE) 2
Ecuador (EC) 2
Malta (MT) 2
Qatar (QA) 2
Algeria (DZ) 2
Nepal (NP) 2
Colombia (CO) 2
Luxembourg (LU) 1
Morocco (MA) 1
Nicaragua (NI) 1
Sudan (SD) 1
Yemen (YE) 1
Trinidad and Tobago (TT) 1
Costa Rica (CR) 1
Nigeria (NG) 1
Cote D'Ivoire (CI) 1
Antigua and Barbuda (AG) 1
Dominican Republic (DO) 1
Georgia (GE) 1
Monaco (MC) 1
Montenegro (ME) 1
Gibraltar (GI) 1
Cuba (CU) 1
Jordan (JO) 1
Mongolia (MN) 1

Tuesday 12 January 2010

EA3FXF- EA3GHS MOSQUITO -UPDATED 13/01/2010


As opposited to the Miss Mosquito 40m rig from qrpproject.de this is a very minimal TCVR using a single IRF510 MOSFET. The above is for 40m and I think mine will be too, but might make it for 80m or 30m as well. The changes are crystal and LPF.

Mine will be a manhatten build and the bare board and chassis with initial pad layout looks like this:


I used a 100mA 6-0-6/240 transformer for the audio and M3 Nylon mounting screws for the IRF510 and transformer. The little black square top right is a 1:1 600:600 ohm isolation transformer for use with PC sound card. I haven't figured out if I'll put a 12V DC socket on the front with the 4K7 pot or just have a pair of leads from the PCB. I think I will rotate the IRF510 though 180 degrees , use the central heatsink hole and as it is isolated from the PCB add a flange to the tab for the drain and not use the central pin (chop it off?), then the key input will be brought to a socket on the front.

What is interesting is on http://ea3ghs.googlepages.com/mosquito they show the project using SDR. I'll pipe the audio from mine into a beta of Simon Brown HB9DRV SDR-Sadio software (http://www.sdr-radio.com/).

Flea Update II

As posted to EMRFD group:

Stephen,

Wow this created a bit of email traffic overnight...

To be honest I must be lucky as mine works, admittedly not first time... I had reversed the windings between earth and antenna initially, and forgotten the 1K resistor between C8 and C10.
However I don't have a copy of EMRFD to have checked circuit theory that I may not have understood anyway (I borrowed a copy once from MI5MTC).
I have never run SPICE, modelled a filter or a tuned circuit either. If I have to do a calculation for a tuned circuit it is usually done long hand on a scrap of paper. I'm not hot on theory as was never taught that much and tend to work things out by doing.

Asked a few things off list so rather than answer individually I hope this answers everyones questions:
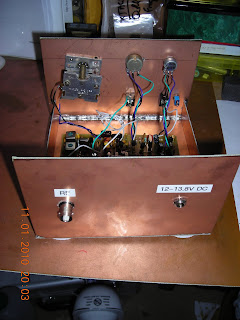
The T1 to be honest I just wound all three windings in the same direction, right handed and held toroid in left hand
and passed wire up though the centre from underneath for each turn, no rocket science or theory involved.
The primary wound first then each of the secondaries wound on top one either side of the primary ends. Imagine pairs of wires come out on three sides of a square, primary in the middle (make sense?). I have since heard that the winding of this is the critical bit. See http://www.qrpedia.com/book/200812/flea-catalonias-answer-pixie for a picture, that is what mine looked like, don't think I would have wound it differently though. I'll take a close up image of T1 as asked by a few and it'll be on blog http://m1kta-qrp.blogspot.com/ when I can get back in the shack
The 2N3866 was from a batch from GQRP I cannot remember who donated them but they are not marked as such. I use them a drivers for a PA stage usually.
The trimmer capacitor there was probably only 10% movement between hearing signals, lots and then nothing again so the tuning is sharp.
I might investigate adding a smaller value cap in parallel to see if the tuning can be improved.
C2 and C3 I use a silver mica and a polystyrene, both were salvaged junk box components.
All the 10nF were box ceramics and had them for years.
All the R were 1/4W
The 1N4148 was actually a 1N914 I use whatever I have interchangably.
The LPF caps were either silver mica or disk ceramics (not NPO).
Q1 gets very hot without a heatsink. Ditto if use 2N2222A
SLA battery was providing 12.8V
If I used shack supply that is fine for normal use a little extra audio 'buzz' heard adding a 12uH choke and a 0.1uF to ground into the +ve lead reduced this.
LM386 used was a 386-1 and the headphones were elcheapo 99p ones from Tescos (similar to WallMart for those in US)
10uV signal source was from NorCal by WA6AYQ, W3CD. I had it callibrated for 50uV, 10uV and 1uV (I added an extra output), nothing difficult about building your own, it is just a 2N3904 oscillator, using HC49 crystals, I added an attenuation pad to obtain 10uV.
The manhatten pads were made using a Harbour hand punch http://m1kta-qrp.blogspot.com/2008/09/2n2-40-build.html
I have no idea why these were asked but:
The glue was poundshop regular super glue.
The yellow cable is solid core.

The shack temp (inside) when I built it was well below freezing as the concentrated FeCL etch solution I use for projects was like a slush puppy
and I added a pad or two extra and the super glue I used didn't always bond to the board (I had to heat up the board using a heat gun on the undersde a couple times to get them to 'stick'). Given your's and few others comments I bet if I tried to reproduce now I couldn't, I'll be jinxed now. Anyway boxing it up with a keyer (prob KD1JV simple keyer, no memories etc) and hope to have some trial qso with G3XBM who is sort of local, but 1.3W on 40m should be fine as that's almost qro hihi

72

Dom


>
>From: Stephen Wandling
>To: emrfd@yahoogroups.com
>Sent: Mon, 11 January, 2010 20:48:20
>Subject: Re: [emrfd] Re: the flea, a 40m minimalist transceiver
>
>
>Dom,
>
>This is great to hear! As you may recall, I too built the "Pulga" or
>Flea xcvr. My trials and tribulations are to be found here:
>http://www.qrpedia. com/book/ 200812/flea- catalonias- answer-pixie
>
>I did get it working, "sort of", on both 40M and 80M. Reading through
>my notes there, its obvious that most of the problems were created by me
>and not the circuit. But, since learning was my prime goal, it all
>worked out great in the end.
>
>I was initially plagued by 'fake' 2N3866 transistors: low Beta. I
>finally got some 2N3553 and the improvement on receive was amazing.
>But, I kept toasting them during the tuning procedure.
>
>Eduardo had said in an earlier post :
>> Yes, FLEA is not very reproducible, you need all the components
>> and EMRFD book to understand what happens when it does not run.
>> This TRX is like the Arecibo Observatory receivers,
>> they are designed and manually tuned for performance,
>> not for reproducibility.
>So congratulations to you are definitely in order!
>
>72
>Stephen
>VE7NSD
>
>Dominic wrote:
>> Eduardo,
>>
>> Built this last night based on information from GQRP SPRAT #137.
>> http://m1kta- qrp.blogspot. com/2010/ 01/flea-40m- cw-minimalist- tcvr.html
>>
>> Nice fun little rig. RX signals from a Vertical 6BTV perfectly readable. The winding direction of T1 is critical though I wired the antenna connecton in reverse initially once corrected adjusting C3 brought in the signals.
>>
>> Managed to use it on 7.025 (FT243), 7.030 (HC49) and 7.040 (HC6) and I have used one half of a turned 8pin DIL socket for the crystal between two manhatten pads so changing frequency is not a problem.
>>
>> Using a small 10uV signal source and step attenuator I could receive signals down to about 0.4uV.
>>
>> Changing C1/C2 and using a different C3 would mean bands 80m-20m should be possible anyone else had success on other bands that they might share with this design?
>>
>> Also...
>> A 2N2222A also works for Q1 but with a much lower output c150mW.
>> Increasing V1 to 50K seemed to shift the RX offset (syntony=tuning? ) a lttle bit more.
>>
>> 72
>>
>> Dom
>> M1KTA

Monday 11 January 2010

Flea TCVR update


Quick update, I have a nice clam shell case that is exactly the right size so I'll be fitting it into it along with a NorCal keyer or a KD1JV simple keyer. Photo shows the NorCal keyer.

KD1JV ADC 40m rig

I had fogotten to take photos of the completed rig.


Sunday 10 January 2010

Weekend projects for the radio amateur MW5ACN

Was given thisfor xmas and I note I have everything to build including some nice air variable caps for the the vfo so will build the 80m cw rig. I'll swap some things though using generic NPN and PNP, LM386 instead of LM380.

I think this might beneit from a dedicated vswr display and a audio derived s meter (same book).

I'll post images and circuits another day.

The Flea 40m CW Minimalist TCVR


Had the bits in a plastic box since SPRAT issue 137 and finally managed to build it. Manhatten style. Just aligned it and tested and it puts out a healthy 1.3W from a SLA battery.


It was fun getting the superglue to secure the pads when the shack temp dipped below freezing. The PCB etch solution was full of ice cystals!

Anyway I include a close up image too. I found the signals stabilised when the xtal case was grounded.

The layout wasn't critical EXCEPT the T1 MUST be wound with all three windings (I used SWG28) in phase. The primary end connected between the trimmer and 56pf cap, the secondaries in phase to the supply railand the antenna. If not it doesn't work!

Nice fun little rig. RX signals from a Vertical 6BTV perfectly readable. The winding direction of T1 is critical though I wired the antenna connecton in
reverse initially once corrected adjusting C3 brought in the signals.

Managed to use it on 7.025 (FT243), 7.030 (HC49) and 7.040 (HC6) (no qrs qso yet!) and I have used one half of a turned 8pin DIL socket for the crystal between two manhatten pads so changing frequency is not a problem.

Using a small 10uV signal source and step attenuator I could receive signals down to about 0.4uV.

Changing C1/C2 and using a different C3 would mean bands 80m-20m should be possible anyone else had success on other bands that they might share with this design?

Also...
A 2N2222A also works for Q1 but with a much lower output c150mW.
Increasing V1 seemed to shift the RX offset (syntony=tuning?) a lttle bit more. I used a 50k pot for the'sintonia' pot. This is for the RX offet. Should be 22K I didn't have one and found 50K to give good results.

The 2N3866 was one of those given out at the Vicarage for the last GQRP Rochdale rally.

I have xtals at 7.010, 7.020, 7.030 and 7.040 so will box this up and try it out. I hear no sidetone though which is a bit hard so might add a k1el, kd1jv or norcal keyer.

Thursday 7 January 2010

frequency counter using NIXIE tubes

Anyone designed a frequency counter using NIXIE tubes that employs
either a PIC or an AVR?

I am thinking of starting with a simple PIC using 2 ports and creating
a 4 character counter, 'BCD' decode using K155ID1 / 74141 to drive the
4 nixies.

openQRP Project


http://openqrp.org/

I'm going to beta build this one for Steve K1EL so will include images here and will feedback onto the site.

I plan on attempting to add a DDS too.

OK despite being near freezing in the shack, just sorted components ready for Rx of the PCB and bits and bobs from Steve.

Tuesday 5 January 2010

FtTuthill80 · Az ScQRPions FtTuthill80 Transceiver


If like me you like homebrewing you might want to check out the FtTuthill80 · Az ScQRPions FtTuthill80 Transceiver http://www.azscqrpions.org/Introduction_to_FT80.htm which is a highly modified version of the Unichip (SPRAT 53 and http://www.hanssummers.com/unichip.html).

There is a yahoo group and one thing in it that I find very useful is Dan Tayloe in a presentation (in video here too http://www.azscqrpions.org/RCFiltersWEB.wmv) went through the design of the audio filters, that you could easily adopt to other applications.

Dan pretty well took the design apart and did a good job adding to the design but in the presentation I think missed the point of the original from Mike King G3MY and that was to build a rig using just one single IC and no other semiconductors. So if mentioned nowhere else it is here. Do more with less.

The project design brief was as a club kit to reduce the different unique part counts which is great but this does mean if not building as a kit, which I would recommend if not regularly homebrewing, that you can make substitutions too. e.g. I bought a pile of NE5534 single low noise op amps a while back and the design uses NE5532 duals but you can use two singles instead. This obviously means the unique part count increases.
There is a programmed PIC in the project too (there almost isn't a new project out there without a PIC or AVR in it these days) and there isn't code or hex available for it so you'll have to buy a kit to get it.

The use of different voltages in the Active R/C filter chain design I think is singularly the biggest nugget of homebrew information that could be obtained from the project too. As Dan stated to me in the group "DC receivers tend to have enough audio gain that they tend to take off and howl. I used Q1 as a "C multiplier" to provide additional isolation from the 12v supply to the first op-amp gain stage. This helps keep voltage variations on the 12v supply caused by the later, larger audio signal stages (IC3) from feeding back into the first op-amp IC4 gain stage. It does help quite a bit. This filtered 11.3v source is also used in the VFO buffer / tripler stages."

http://groups.yahoo.com/group/FtTuthill80/ contains the schematic and what is quite amazing pdf documents that detail PCB case construction, so if never done that before take a look. The group I am sure will take off once the kits go out which is imminently.

The one at the top of the post and these other images of Dan's own PCB chassis version of the rig are from the group.


I will include images of my own manhatten build soon.

I am also a bit baffled about the comments in the group about CA3086 as the CA3083 is almost the same, pin changes but very much still available, even in SMT form and would work just as easily.
CA3086 data sheet http://www.intersil.com/data/fn/fn483.pdf
CA3083 data sheet http://www.intersil.com/data/fn/fn481.pdf

The more modern HFA3046 is the same as the original CA3086
http://www.intersil.com/data/fn/fn3076.pdf


OK despite being near freezing in the shack, just sorted components ready for a Manhatten build. I am short one or two items but an order with Farnell or Jabdog should sort them out.